 AduHid Click-by-Click with C (Visual
Studio)
AduHid Click-by-Click with C (Visual
Studio)
These instructions show how to compile example C code using Visual Studio 6.0. This page is a click-by-click introduction for people unfamiliar with Visual Studio.
Briefly the steps are:
- Create an empty project
- Create the source code file
- Copy the AduHid header and lib files
- Point the compiler at the aduhid.lib
- Compile the program
- Copy the AduHid dynamic link library
- Run the program
How to Create an Empty Project
Start Visual Studio.
Left-click the File button on the menu
On the File drop down, left-click New
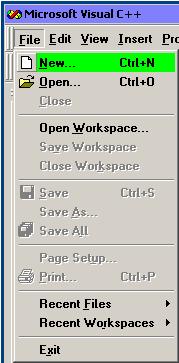
The New item selection window appears
Type in the Project Name (eg. MyAduCode)
Left-click the "Win 32 Console Application" list item to select it.
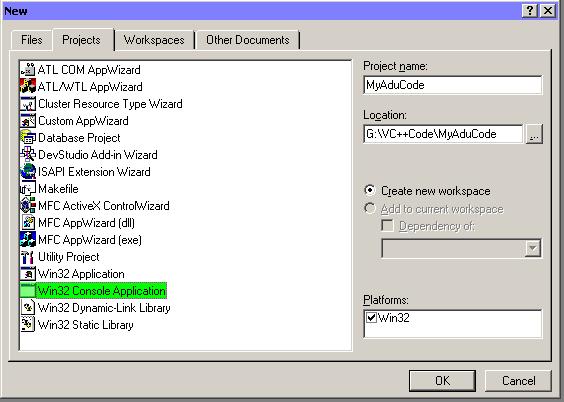
Left-click the OK button
The "Win 32 Console Application" wizard appears.
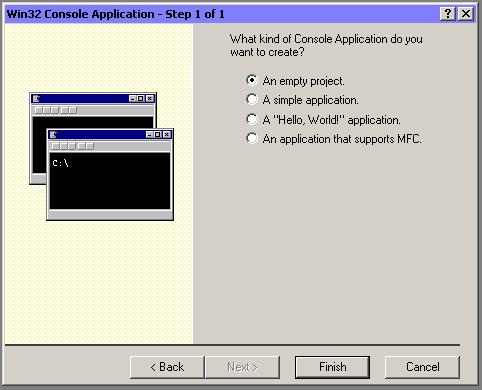
Left-click the Finish button to continue.
The "New Project Information" window appears.
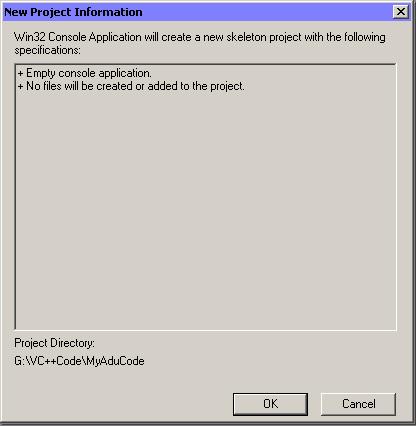
Left-click "OK" to create an empty project.
How to Create the Source Code File
Left-click the File button on the menu
On the File drop down, left-click New
The "New" item selection window appears.
Type in the File name (eg. MyAduCode.c)
Left-click the C++ Source File list item to select it.
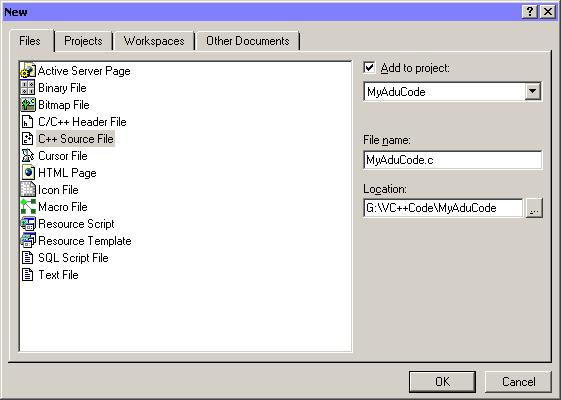
Left-click the "OK" button to create the source code file.
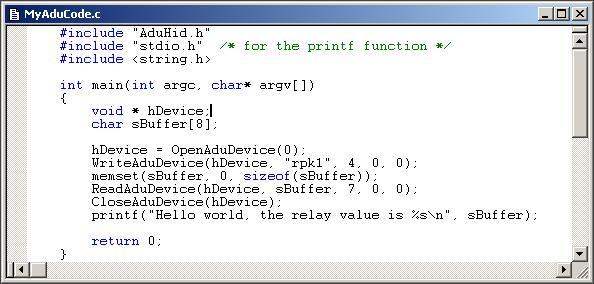
An editor window entitled "MyAduCode.c" appears.
Type the program into the editor window.
(or cut and paste the code from the pre-formatted listing at the
bottom of this page)
Left-click the File button on the menu
On the File drop down, left-click Save
Copying the AduHid Header and Lib Files
Use Windows Explorer or My Computer to copy the AduHid files into the directory that the
program source code is in. These files are on the media that came with the ADU device.
The files to copy are:
- AduHid.h
- AduHid.lib
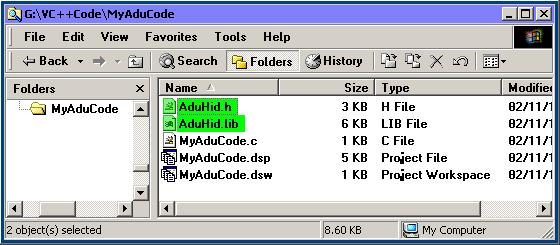
Note: Do not be mislead by the VC++Code directory in the example. This program is NOT
written in C++; it is a simple C program.
Pointing at the AduHid Library
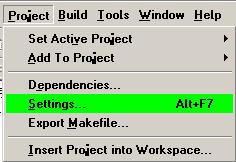
Left-click the Project button on the menu
On the Project drop down, left-click Settings
The "Project Settings" window appears.
Left-click the Link tab.
In the field labeled "Object/library Modules:" add the text aduhid.lib.
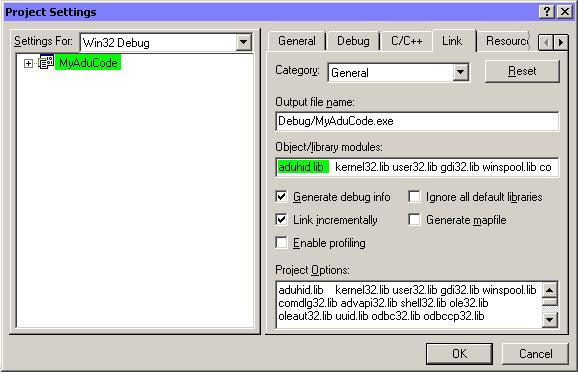
Left-click the OK button.
Compiling the program
Left-click the Build button on the menu
On the Build drop down, left-click Build MyAduCode.exe
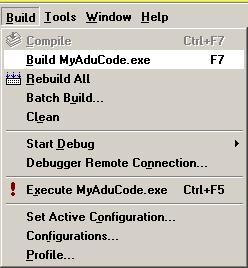
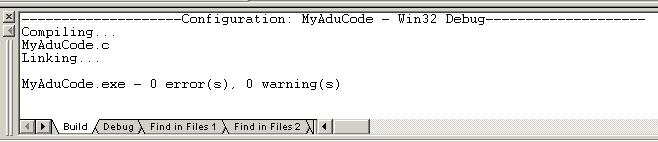
Check the build results to ensure that the program compiled correctly.
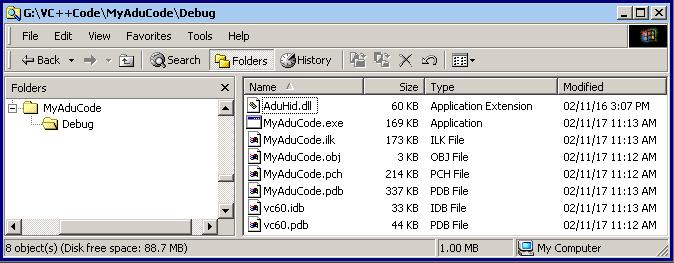
The compiler creates a sub-directory called Debug into which it places the
executable file for the program.
Copying the AduHid Dynamic Link Library
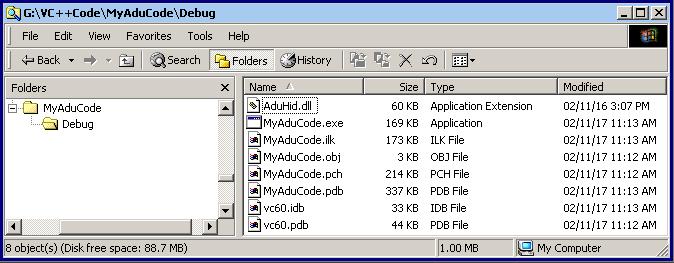
The program must be able to find the AduHid.dll file when it runs. Copy the AduHid.dll
into the Debug directory that holds the executable file. The AduHid.dll file is on
the media that came with the ADU device.
Use Windows Explorer or My Computer to copy the AduHid.dll file.
Running The Program
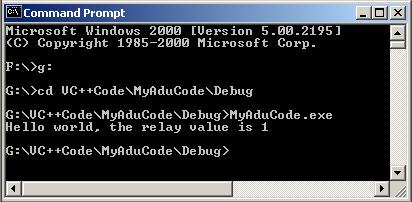
Open a DOS Command Prompt window.
Use the cd (change directory) command to navigate to the Debug directory that contains the
executable file (eg. MyAduCode.exe).
Type MyAduCode into the command prompt window and press the enter key.
Watch the fireworks.
Source Code
Here is the source code for the minimal ADU example.
Cut-and-paste the following lines from the browser into the editor window of Visual
Studio.
    #include "AduHid.h"
    #include "stdio.h"  /* for the printf function */

    int main(int argc, char* argv[])
    {
        void * hDevice;
        char sBuffer[8];

        hDevice = OpenAduDevice(0);
        WriteAduDevice(hDevice, "RPK1", 4, 0, 0);
        memset(sBuffer, 0, sizeof(sBuffer));
        ReadAduDevice(hDevice, sBuffer, 7, 0, 0);
        CloseAduDevice(hDevice);
        printf("Hello world, the relay value is %s\n", sBuffer);
        return 0;
    }