Note: AduHidTest software has been upgraded to version 4.0 as of February 20, 2023. The software was upgraded to facilitate the use of the pending new ADU73 and ADU816 in streaming mode, and some other minor improvements. The DLL has not been modified and remains at version 2.2.0.0.
AduHidTest is a free USB Device test program used to connect to ADU data acquisition devices, and send and receive data. The program is a useful tool to allow programmers to become familiar with the operation of ADU interfaces and programming requirements. Download links are at the bottom of this page.
For this tutorial we will use an
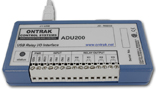
ADU200 USB Relay I/O Interface to demonstrate use of
the software.
Getting Started: There are three steps in using a USB device in any application
software. The three steps are , A handle is a unique code that application software uses to identify
a USB device for the purpose of reading and writing to the device. A USB bus can
have up to 128 devices connected to a single host and there are three criteria that can be
used to open a handle. The three criteria are,
Vendor ID,
Product
ID and
Serial Number. If a single device is connected to the
bus, any of the three criteria may be used. If multiple devices are connected, we
recommend using the Serial Number to open the handle ( All ADU devices
have their unique serial number printed on the top label ) The AduHidTest program main
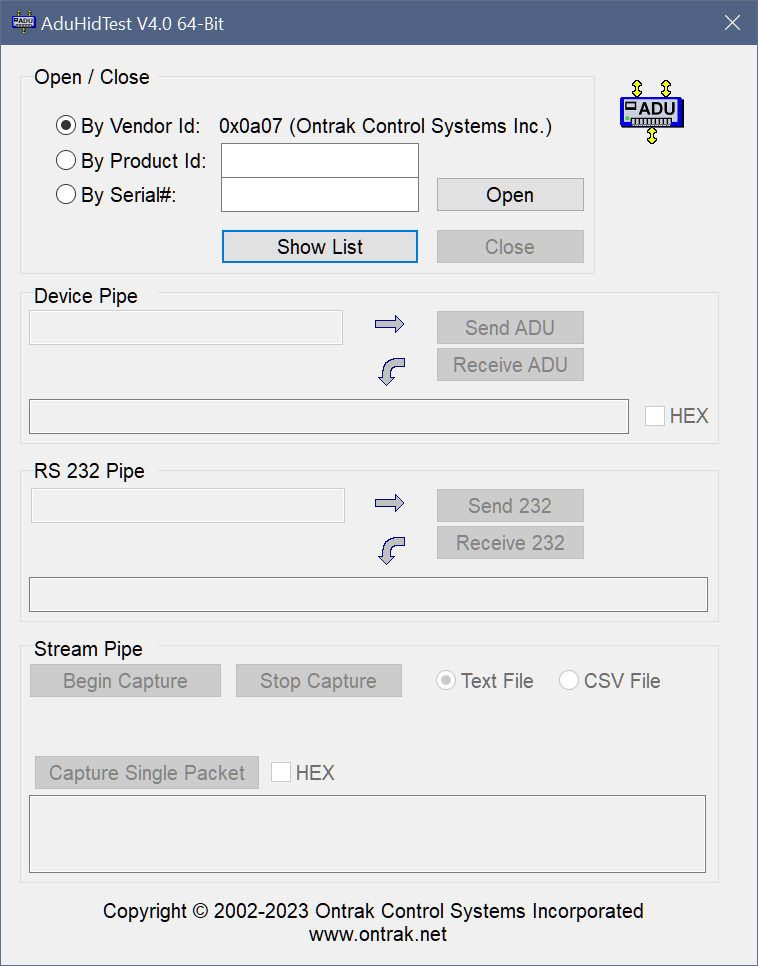
Window is shown in Figure 1.
Figure 1: AduHidTest Main Window The Open/Close section of the window is where the handle is
determined and there is a Show List button in the section. Click on the
Show List button to view the devices connected to the USB bus. ( Note: Only
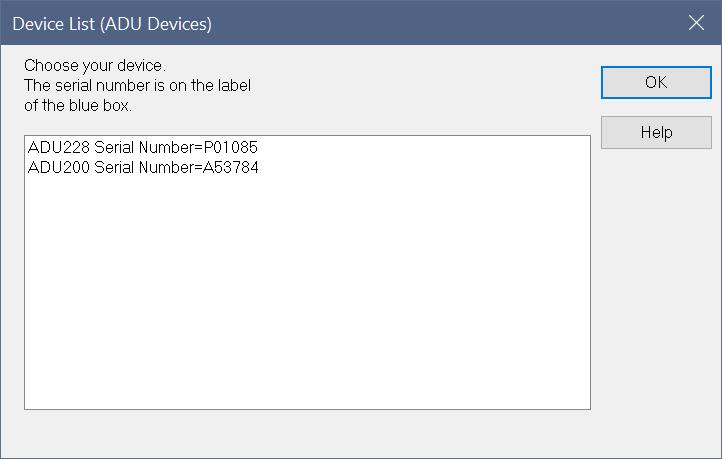
ADU devices will be listed ) Figure 2 is the window that appears when the Show
List Button is clicked.
Figure 2: " Show List " Display The display indicates that we have an ADU200 device (
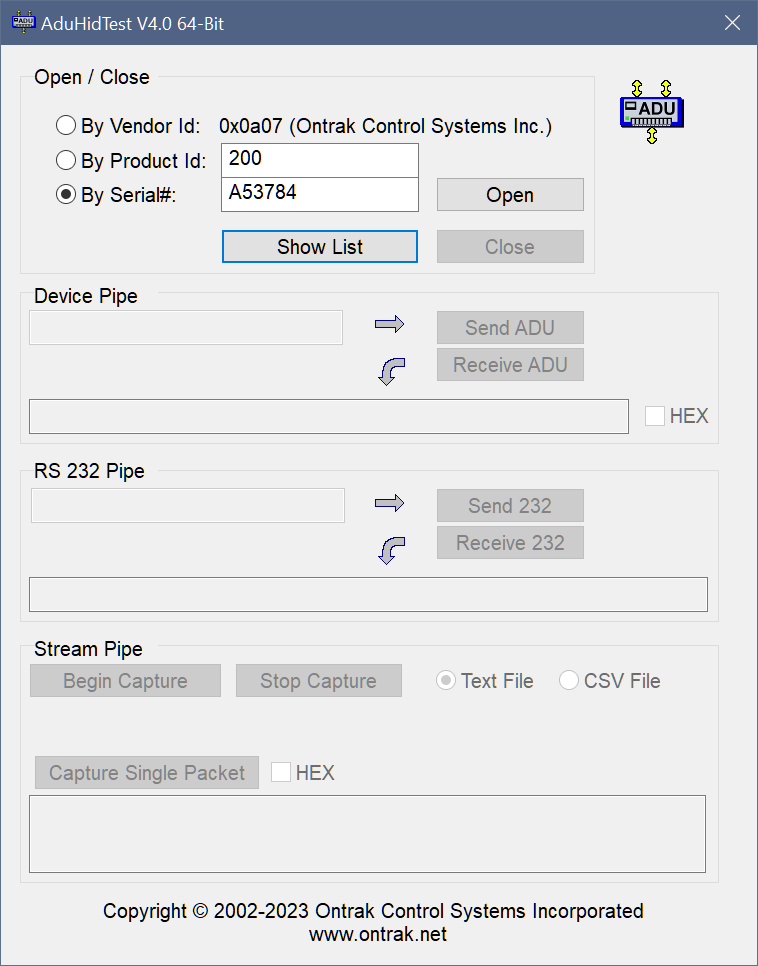
Serial # A53784) and an ADU228 ( Serial # P01085) connected. Select a device by clicking on the desired device. The
AduHidTest main window will now display the product ID and Serial number. Click the By
Serial # radio button and then click Open to open the handle to the
selected ADU device. Note that we could also open
By Product ID as we have two different ADU devices connected.
If two of the same type of device were connected we would have to use the
open By Serial# option.
Figure 3: Connected to ADU200 Serial# A53784 Once connected, you may now send commands to the available
"pipes" on the device. Pipes are the individual connections to functional
sections of the ADU200. The Device Pipe is used to send standard ASCII
ADU commands to control the peripherals built into the ADU200
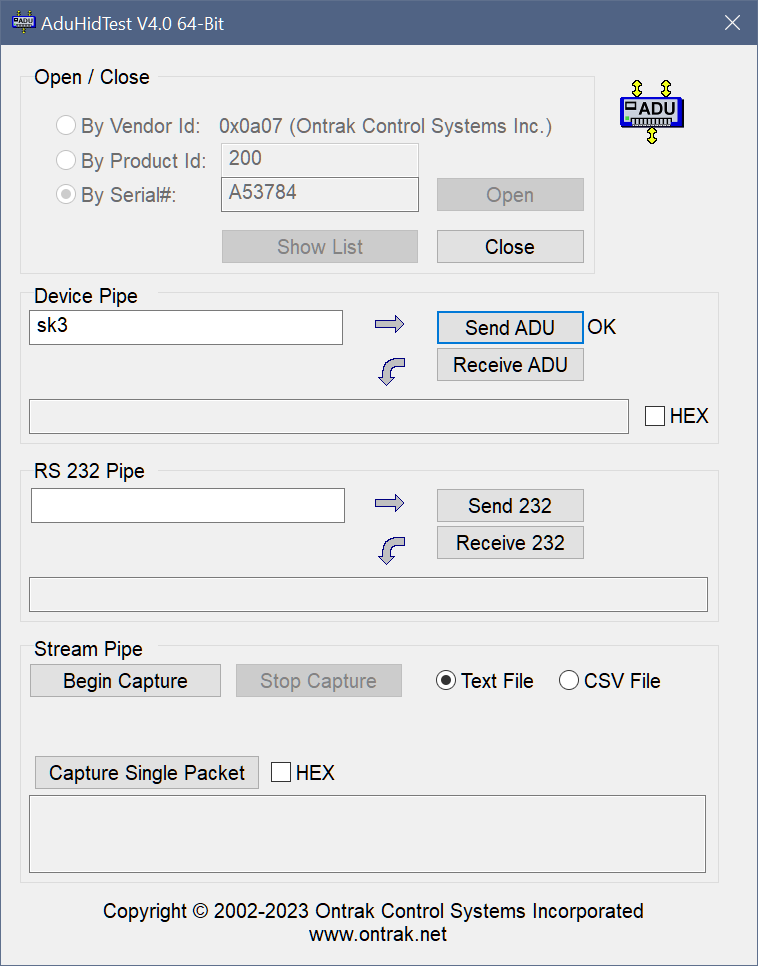
such as the relay outputs or event counter inputs. Type "sk3" (
Close relay K3 ) into the device pipe send window and click Send ADU .
Relay K3 on the ADU200 will close and the software will display a small "OK"
next to the Send ADU button indicating the command was sent.
Figure 4: Sending "sk3" Command Some commands will cause a response to be sent from the ADU
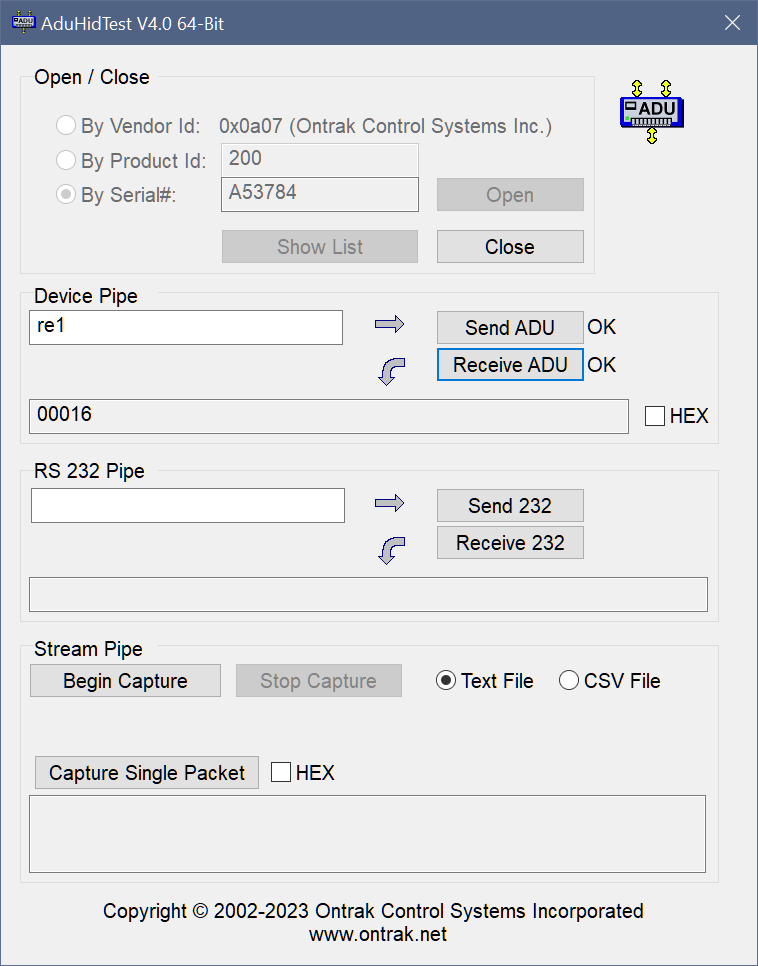
device to the host computer. For example, if an "re1" ( read event counter 1 )
command is sent, the ADU200 will send back the 5 digit count. To read responsive
commands, simply click the Receive ADU button and the data will be displayed.
Figure 5: Sending "re1" and Receiving Count
Data The RS232 Pipe is used to send and receive ASCII strings to any
RS232 based device connected to the ADU200 auxiliary serial port. The method of
sending commands is identical to device pipe, in that you simply enter the ASCII
command string, and click the Send 232 button. Data is received, and then
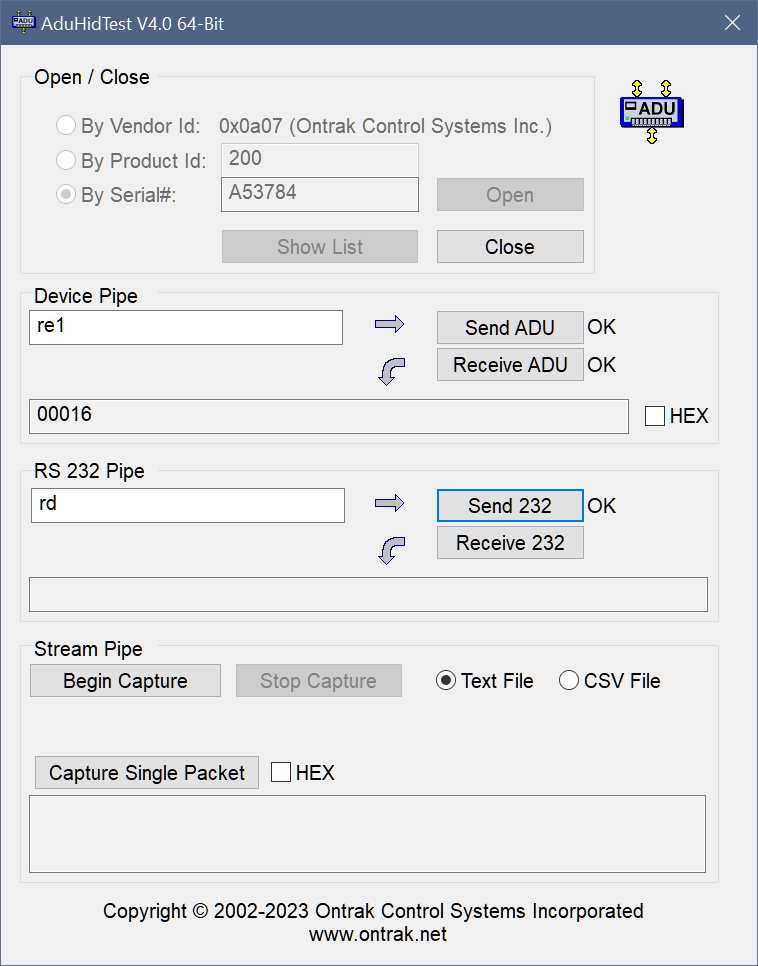
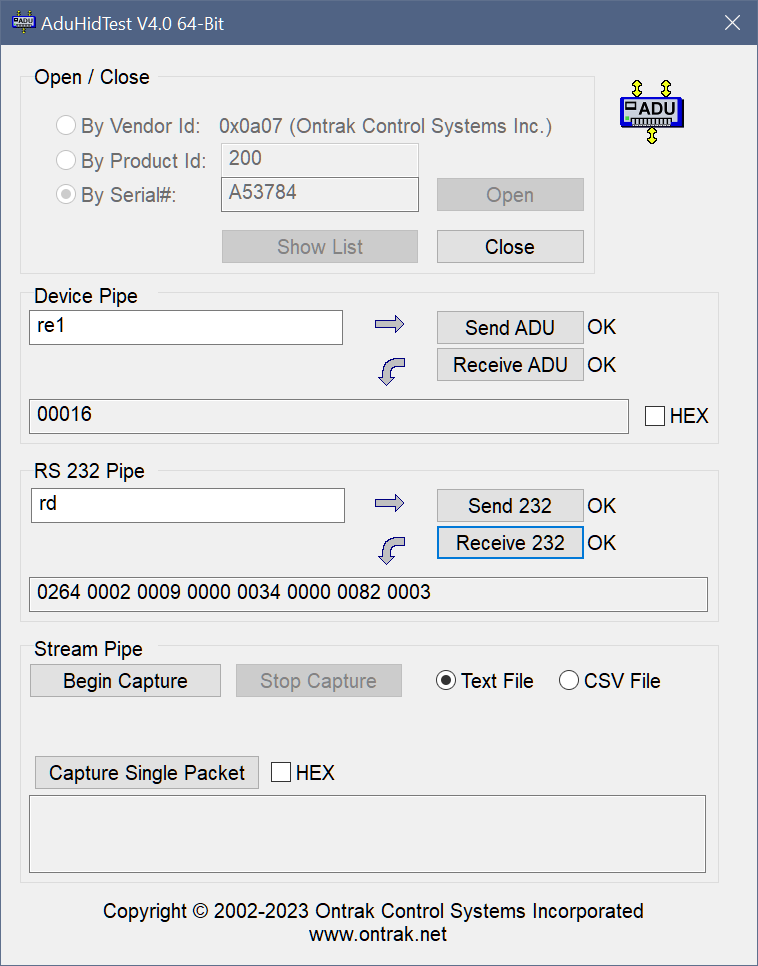
displayed when the Receive 232 button is clicked. In the following example, an "rd" ( analog array read )
command is sent to an ADR2000B Data Acquisition Interface
connected
the ADU200 auxiliary serial port. Figure 6 shows the "rd" command being sent
and Figure 7 shows the returned data displayed after the Receive 232 button is
clicked.
Figure 6: Sending "rd" Command to RS232
Pipe
Figure 7: Receiving Data on RS232 Pipe Presently, most off-the-shelf ADU devices do not support streaming
functionality. The new ADU73 and
pending ADU816 interface do support
streaming and below is a link to continue the tutorial outlining the
streaming functions along with instructions on importing and displaying data
in Excel. DOWNLOAD AduHidTest Here: Download AduHidTestV4.0 (64-Bit)
now, in ZIP Format
( 1.2MB ). ( Contains DLL Ver 2.2 ) Download
AduHidTestV4.0 (32-Bit)
now, in ZIP Format
( 1MB ). ( Contains DLL Ver 2.2 )
STEP 1: Obtain a handle for the USB Device (
ADU200 USB Relay I/O Interface )
STEP 2: Send Commands to the USB Device (
ADU200 USB Relay I/O Interface)
STEP 3: Receive Data from the USB
Device ( ADU200 USB Relay I/O Interface)
Click here to continue tutorial .....
AduHidTest Tutorial Part 2 - Streaming Function