|
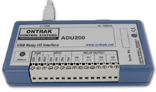 View the ADU series of USB based Data Acquisition Products
Introduction
Communicating with USB devices in Visual Studio, or
virtually any application software, involves a few
simple steps. Unlike RS232 based devices which are
connected to physical COM ports, USB devices are
assigned a logical handle
by operating systems when they are first plugged in.
This process is known as enumeration.
Once a USB device has been
enumerated, it is ready for use by the host computer
software. For the host application software to
communicate with the USB device, it must first obtain
the handle assigned to the USB device during the
enumeration process. The handle can be obtained using an
open function along with
some specific information about the USB device.
Information that can be used to obtain a handle to a USB
device include, serial number,
product ID, or vendor
ID. Once the handle is obtained, it is used to allow the
application to read and write information, to and from,
the USB device. Once the application has finished
with all communication with the USB device, the handle
is closed. The handle is generally closed when the
application terminates.
The AduHid DLL provides all the
functions to open a handle, read and write data, and
close the handle of ADU USB devices. The ADUHID dll can
be used directly from a C# application.
The sample program below is a
rendition of our AduHidTest program demonstrating the proper method to
utilize the functions within the ADUHID dll to
communicate with ADU, USB based data acquisition
products. The
example also includes use of the functions ADUCount,
GetADU and GetAduDeviceList which are new to the ADUHID
and ADUHID64 dll's Ver 2.2.
The resulting executable was tested under Windows 7 and 10.
All source code is provided so that you may review details that
are not highlighted here.
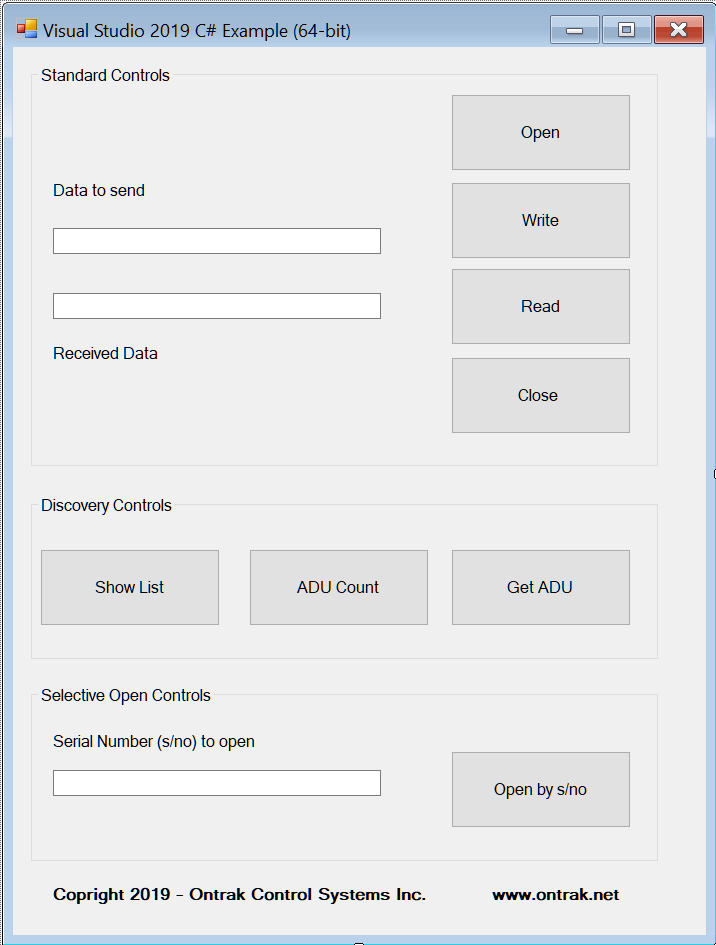
Figure 1. AduHidTest C# Example (Visual Studio 2019)
Lets have a look at the code......
For Visual Studio to have access to the functions inside
the AduHid dll the individual functions must be declared
outlining the syntax and data formats used by each
function.
Our program declares all the functions to be
called by the application. In the example shown, the
AduHid64.dll is referenced. Note that in the 32 bit
version, the AduHid.dll ( 32 bit version) is referenced.
Note that specific details of the individual
functions are available in the
ADU On-line SDK.
(Small text used to make it fit the web page....full
size text in the sample code download below !)
static class Module
{
public struct ADU_DEVICE_ID
{
public short iVendorId;
public short iProductId;
[System.Runtime.InteropServices.MarshalAs(System.Runtime.InteropServices.UnmanagedType.ByValTStr,
SizeConst = 7)]
public string sSerialNumber;
}
[System.Runtime.InteropServices.DllImport("AduHid64.DLL")]
public static extern int OpenAduDevice(int iTimeout);
[System.Runtime.InteropServices.DllImport("AduHid64.DLL")]
public static extern int WriteAduDevice(int aduHandle,
string IpBuffer, int lNumberOfBytesToWrite, ref int
lBytesWritten, int iTimeout);
[System.Runtime.InteropServices.DllImport("AduHid64.DLL")]
public static extern int ReadAduDevice(int aduHandle,
StringBuilder lpBuffer, int lNumberOfBytesToRead, int
lBytesRead, int iTimeout);
[System.Runtime.InteropServices.DllImport("AduHid64.DLL")]
public static extern int CloseAduDevice(int
iOverlapped);
[System.Runtime.InteropServices.DllImport("AduHid64.DLL")]
public static extern int ShowAduDeviceList(ref
ADU_DEVICE_ID pAduDeviceId, string sPrompt);
[System.Runtime.InteropServices.DllImport("AduHid64.DLL")]
public static extern int
OpenAduDeviceBySerialNumber(string pSerialNumber, int
iTimeout);
[System.Runtime.InteropServices.DllImport("AduHid64.DLL")]
public static extern int ADUCount(int iTimeout);
[System.Runtime.InteropServices.DllImport("AduHid64.DLL")]
public static extern int GetADU(ref ADU_DEVICE_ID
pAduDeviceId, int iIndex, int iTimeout);
}
The Standard Controls
The Standard Controls, function identical to the
AduHidTest software. There are four buttons available to
Open, Write,
Read, and Close,
and, two text boxes for Data To Send
and Received Data. The OPEN
button retrieves the handle for the first ADU device it
sees using the Ontrak Vendor ID. If you have more
than one ADU connected, see below section on Selective
Open Controls.
Once the handle is obtained, the command to send to
the ADU is typed into the Data To Send
text box, and the Write button
is pressed to send the command to the ADU. If the
command is sending a response, the Read
button can now be activated and the data read back will
be displayed in the Received Data
text box. The Close button can
then be pressed to close the handle to the ADU.
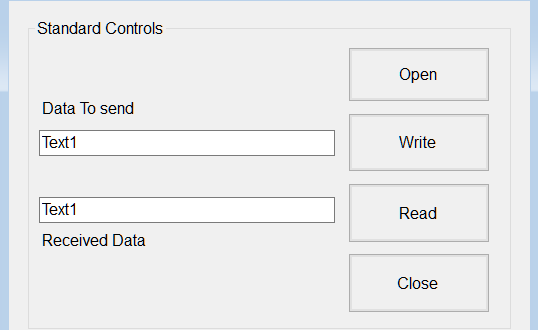
Figure 3: The Standard Controls
Here are the subroutines
for each element and a few
comments.
The Open button
#region Open Button
private void OpenButton_Click(System.Object eventSender,
System.EventArgs eventArgs)
{
aduHandle = Module.OpenAduDevice(1);
//Opens the handle to the ADU device connected to the
USB port
}
#endregion
The Write button
#region Write Button
private void WriteButton_Click(System.Object
eventSender, System.EventArgs eventArgs)
{
int iRC;
int iBytesWritten = default(int);
var arglepBuffer = TextBox1.Text;
iRC = Module.WriteAduDevice(aduHandle, arglepBuffer,
TextBox1.Text.Length, ref iBytesWritten, 500);
//Sends the ASCII command to the ADU device
}
#endregion
The Read button
#region Read Button
private void ReadButton_Click(System.Object eventSender,
System.EventArgs eventArgs)
{
int iRC;
int iBytesRead = 0;
StringBuilder sResponse = new StringBuilder(64);
sResponse.Append("No Data");
// The preloaded string is "+++No Data+++" which will be
displayed if there is no returned data.
iRC = Module.ReadAduDevice(aduHandle, sResponse, 7,
iBytesRead, 500);
TextBox2.Text = sResponse.ToString();
//Displays the received ASCII string in the Textbox
}
#endregion
The Close button
#region Close Button
private void CloseButton_Click(System.Object
eventSender, System.EventArgs eventArgs)
{
Module.CloseAduDevice(aduHandle);
aduHandle = 0;
//Closes the handle to the ADU device connected to the
USB port
}
#endregion
The Discovery Controls
The Discovery Controls are advanced functions built
into the AduHid dll to obtain information about ADU
devices connected to the host computer. These
functions can be used to automate the selection of
connected ADU devices. The Show List
button causes a pop-up window to display a list of
connected devices and some relevant information. The
ADU Count button causes a
message box to appear showing how many ADU devices are
connected. The Get ADU button
causes a message box to display the connected devices
one at a time including their index number.
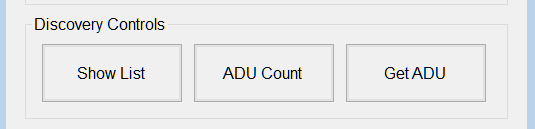
Figure 4: The Discovery Controls
Here are the subroutines
for each element and a few
comments.
The Show List button
#region Show List Button
private void ShowListButton_Click(System.Object
eventSender, System.EventArgs eventArgs)
{
Module.ADU_DEVICE_ID myAduDeviceId =
default(Module.ADU_DEVICE_ID);
int iRC;
var argsPrompt = "Connect ADU Devices";
iRC = Module.ShowAduDeviceList(ref myAduDeviceId,
argsPrompt);
//Displays the available ADU Device(s)
}
#endregion
The ADU Count button
#region ADU Count Button
private void ADUCountButton_Click(System.Object
eventSender, System.EventArgs eventArgs)
{
MessageBox.Show("ADU Count: " + Module.ADUCount(100));
//Max 100 ADU devices
//Counts the number of ADU device(s) plugged in
}
#endregion
The GetADU button
#region Get ADU Button
private void GetADUButton_Click(System.Object sender,
System.EventArgs e)
{
Module.ADU_DEVICE_ID pADU =
default(Module.ADU_DEVICE_ID);
for (int iAduIndex = 0; iAduIndex <=
Module.ADUCount(100) - 1; iAduIndex++)
{
Module.GetADU(ref pADU, iAduIndex, 100);
MessageBox.Show("Index: " + iAduIndex + " Model: " +
pADU.iProductId + " Serial Number: " +
pADU.sSerialNumber);
}
//Displays the ADU device(s) information
}
#endregion
Selective Open Control
The Selective Open Control allows the handle to a
specific connected ADU device to be obtained by typing
the serial number into the Serial Number
(s/no) to open text box and clicking the
Open by s/no button. The
Standard Controls can then be used to communicate with
the selected ADU device.
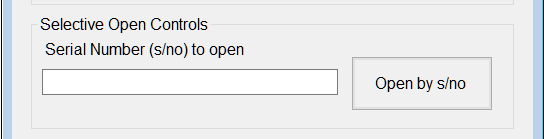
Figure 5: Selective
Open Control
Here is the
subroutine.
The Open by s/no button
#region Open s/no Button
private void OpenSNOButton_Click(object sender,
EventArgs e)
{
var argpSerialNumber = TextBox3.Text;
aduHandle =
Module.OpenAduDeviceBySerialNumber(argpSerialNumber, 1);
//Opens the ADU device by its serial number
}
#endregion
Authored by Bay Ross, June 2019
DOWNLOAD C# Example Files in
ZIP format for 32-Bit Development (Visual Studio 2019).
DOWNLOAD C# Example Files in
ZIP format for 64-Bit Development (Visual
Studio 2019).
|